
Ethers vs Web3 | Which is the best library to interact with smart contracts?
 By Dibas Dauliya
Share
By Dibas Dauliya
Share


Ethers.js and Web3.js are the most popular JavaScript libraries to interact with smart contracts. If you are new to Web3, then you might be super confused about which is best. Well, both of them have their pros and cons, but nowadays most developers are using Ethers.js because of its user-friendly syntax. BUT, keep in mind that you are not born to be influenced without proper research. Ethers.js might be easy peasy lemon squeezy for certain developers, while it might be a pain in the eyes for you. So I highly recommend you go through this article, build a sample project, and decide on your own.
Web3.js is the oldest library, which was released in 2015 by ChainSafe Systems. Ethers.js is a relatively new library, released in 2016 by Richard Moore and the ethers community. Web3.js has a GNU Lesser General Public License (LGPL-3.0), while Ethers.js has an MIT license. Both are actively maintained, open-source projects and have a massive community. Surprisingly, both are based in Toronto, Canada.
The main reasons behind most of the developers' choosing the Ethers.js library over Web3.js are its smaller bundle size, user-friendly API structure, extensive and concise documentation, and that it is written in TypeScript. Web3.js is written in node.js and has a comparatively larger bundle size and less extensive documentation than Ethers.js.
During the blockchain transaction, Ethers.js gives more information directly in the receipt while Web3.js returns "promiEvents" where we can request an event like "receipt" or "transactionHash" to access the information of a blockchain transaction. We can wait for the confirmation of the transaction using response.wait() in Ethers.js and do the post transaction things while we can do the post transaction things in Web3.js under those "promiEvents".
ENS (Ethereum Name Service) like marak.eth, which is the shorter and more friendly version of a cryptocurrency address, is directly supported in Ethers.js and can be used anywhere in place of an Ethereum address, while we should implement extra code to resolve ENS in Web3.js.
Ethers.js is the default library for Hardhat, while Web3.js is the default library for Truffle Suit. However, the default library can be overridden. Hardhat and Truffle are the tools to develop smart contrast, and they also have their own pros and cons, which we have discussed in this article.
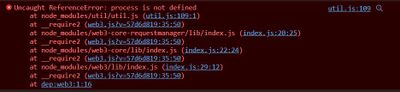
At the time of writing this article, Web3.js doesn’t work with React apps and gives the following error because NodeJS polyfills are not included in the latest version of the React app. Please go through this official documentation to solve that issue. However, Ethers.js is widely supported.
Small Project
Enough theory, let’s build an app using both libraries and make read and write requests on the blockchain.
In these small projects, we’ll use the smart contract developed using Hardhat in the article "Truffle vs. Hardhat." We need the ABI (Application Binary Interface) code, contract address, and the address that has test ethers, which we got during the deployment of the smart contract in that article. So please make sure you have deployed the contract and keep running the local development node.
Follow the steps mentioned above OR Clone this repo and then CD into smart-contracts and then run the below commands.
  npx hardhat node  # to run local blockchain development server
npx hardhat run scripts/sample-script.js --network localhost # to deploy the contractNote: Do not shutdown the local server; it needs to be running until we develop the entire DApp. It also logs the transaction events and error logs if any occur.
After running the local server, you will get 20 test accounts with 1000 ethers in each account. Copy the private key of the first account and import it into your MetaMask wallet as follows.
Switch your network to the Localhost and you must see around 9999.9996 ETH balance in that account.
Deployment of the contracts charges a small amount of ethers as a gas fee, and it will use the ethers of the first test account.
Also, after deployment, it will generate the ABI code under the artifacts folder of the project. Please copy the JSON file from name_of_the_project/artifacts/contracts/Greeter.json, and then create a new folder for the dapp project and paste it under that folder. You can use the following commands instead of using the GUI (Graphical User Interface). Make sure you are inside the smart contract project.
  cd ..
  mkdir dapp
  mv name_of_the_project/artifacts/contracts/Greeter.sol/ dapp/ABI
  cd dapp
Using Ethers.js
Create a new folder named using-ethers under the dapp folder, and create an html file and add the following content.
  <!DOCTYPE html>
  <html lang="en">
    <head>
      <meta charset="UTF-8" />
      <meta name="viewport" content="width=device-width, initial-scale=1.0" />
      <title>Using Ethers</title>
      <link rel="stylesheet" href="./../style.css" />
    </head>
    <body>
      <div>
        <button id="connect" onclick="connectWallet()">Connect</button>

        <ul>
          <li>Address: <span id="address"></span></li>
          <li>Balance: Ξ <span id="balance"></span></li>
        </ul>

        <h2>Our special data from Contract</h2>

        <fieldset>
          <legend>Reading data from smart contract</legend>
          <button onclick="fetchData()">Fetch Data</button>
          <p>Greeting: <span id="response"></span></p>
        </fieldset>

        <fieldset>
          <legend>Writing data to smart contract</legend>
          <form id="form">
            <label htmlFor="text"> <strong>Edit data</strong></label>
            <input type="text" id="text" name="greet" required />
            <button type="submit">Edit</button>
          </form>
        </fieldset>
      </div>
    </body>
  </html>
Also, create the style.css file under dapp folder and add the following content. We will utilize the same file across both the Ethers.js and Web3.js apps.
  body {
    margin: 5em auto;
    font-family: -apple-system, BlinkMacSystemFont, 'Segoe UI', 'Roboto', 'Oxygen',
      'Ubuntu', 'Cantarell', 'Fira Sans', 'Droid Sans', 'Helvetica Neue',
      sans-serif;
    background-color: #282c34;
    color: #fff;
    max-width: 600px;
  }

  button {
    padding: 0.5em 1.5em;
    cursor: pointer;
  }

  form {
    display: grid;
    gap: 0.5em;
    place-content: start;
  }

  [type='submit'] {
    padding: 0.2em;
  }

  fieldset {
    margin: 1em 0;
  }
Let’s import the Ethers.js library as:
  <!DOCTYPE html>
  <html lang="en">
    <head>...</head>
    <body>...</body>
    <script
        src="https://cdn.ethers.io/lib/ethers-5.6.umd.min.js"
        type="text/javascript"
      ></script>
  </html>
Now, let's make a functionality to connect with the wallet and get the address and balance.
  const btnConnect = document.getElementById('connect'),
    uiAddress = document.getElementById('address'),
    uiBalance = document.getElementById('balance'),
    response = document.getElementById('response'),
    form = document.getElementById('form'),
    submitBtn = document.querySelector('button[type]')

  let userAddress
  const contractAddress = '0x5FbDB2315678afecb367f032d93F642f64180aa3' // address given while deploying the smart contract

  async function connectWallet() {
    const provider = new ethers.providers.Web3Provider(window.ethereum)
    await provider.send('eth_requestAccounts', [])
    const signer = provider.getSigner()

    const address = await signer.getAddress(),
      balance = await provider.getBalance(address),
      formattedBalance = ethers.utils.formatEther(balance)

    uiAddress.innerText = address
    userAddress = address
    uiBalance.innerText = formattedBalance
    btnConnect.innerText = 'Connected'
  }
This implements the function to fetch the address and balance from the wallet and display them on the DOM.
Let’s add the ability to read smart contracts to our app.
  async function getABI() {
    const data = await fetch('./../ABI/Greeter.json')
    const { abi } = await data.json()
    return abi
  }

  async function fetchData() {
    const provider = new ethers.providers.Web3Provider(window.ethereum)
    const abi = await getABI()

    const contract = new ethers.Contract(contractAddress, abi, provider)

    const res = await contract.greeting()
    response.innerText = res
  }
When the user clicks the ‘Fetch Data’ button, fetchData() function gets called and gives the response from the greeting function of the contract.
For the write function, we’ll listen to the submit event of the form and then send the entered data to the blockchain. As discussed above, I have used the wait() method to wait for the result from the blockchain.
  form.addEventListener('submit', async (e) => {
    if (!userAddress) {
      alert('Please connect to the wallet')
      return
    }

    e.preventDefault()
    submitBtn.innerText = 'Loading...'

    const abi = await getABI()

    const provider = new ethers.providers.Web3Provider(window.ethereum)
    const signer = provider.getSigner()
    const contract = new ethers.Contract(contractAddress, abi, signer)

    const form = new FormData(e.target)
    const { greet } = Object.fromEntries(form.entries())

    const transaction = await contract.setGreeting(greet)
    await transaction.wait()
    submitBtn.innerText = 'Edit'
    fetchData()
    console.log('transaction', transaction)
  })
Using Web3.js
Create a new folder named using-web3 under the dapp folder, and create an html file and add the same content as above.
Now, to import the Web3.js library, copy and paste the following script right below the end of the body tag:
  <script
    src="https://cdn.jsdelivr.net/npm/web3@latest/dist/web3.min.js"
    type="text/javascript"
  ></script>
Just like above, let's get the address and balance from the wallet and populate them in the UI:
  const btnConnect = document.getElementById('connect'),
    uiAddress = document.getElementById('address'),
    uiBalance = document.getElementById('balance'),
    response = document.getElementById('response'),
    form = document.getElementById('form'),
    submitBtn = document.querySelector('button[type]')

  let userAddress
  const contractAddress = '0x5FbDB2315678afecb367f032d93F642f64180aa3' // we'll get it while deploying the smart contract

  async function connectWallet() {
    const web3 = new Web3(window.ethereum)
    const [address] = await web3.eth.requestAccounts()

    const balance = await web3.eth.getBalance(address)
    const formattedBalance = await web3.utils.fromWei(balance, 'ether')

    uiAddress.innerText = address
    userAddress = address
    uiBalance.innerText = formattedBalance
    btnConnect.innerText = 'Connected'
  }
When a user clicks the Fetch Data button, the following function gets called:
  async function getABI() {
    const data = await fetch('./../ABI/Greeter.json')
    const { abi } = await data.json()
    return abi
  }

  async function fetchData() {
    const web3 = new Web3(window.ethereum)
    const abi = await getABI()

    const contract = new web3.eth.Contract(abi, contractAddress)

    const res = await contract.methods.greeting().call()
    response.innerText = res
  }
To make the write request in blockchain, let’s listen to the submit event of the form, capture the input data, and make the transaction.
  form.addEventListener('submit', async (e) => {
    if (!userAddress) {
      alert('Please connect to the wallet')
      return
    }

    e.preventDefault()
    submitBtn.innerText = 'Loading...'

    const abi = await getABI()

    const web3 = new Web3(window.ethereum)
    const contract = new web3.eth.Contract(abi, contractAddress)

    console.log(contract)
    console.log(userAddress)

    const form = new FormData(e.target)
    const { greet } = Object.fromEntries(form.entries())

    const txHash = contract.methods
      .setGreeting(greet)
      .send({ from: userAddress })
      .on('receipt', (data) => {
        submitBtn.innerText = 'Edit'
        fetchData()
        console.log(data)
      })
})Note: You can clone this repository to check the final code if you feel you are lost.
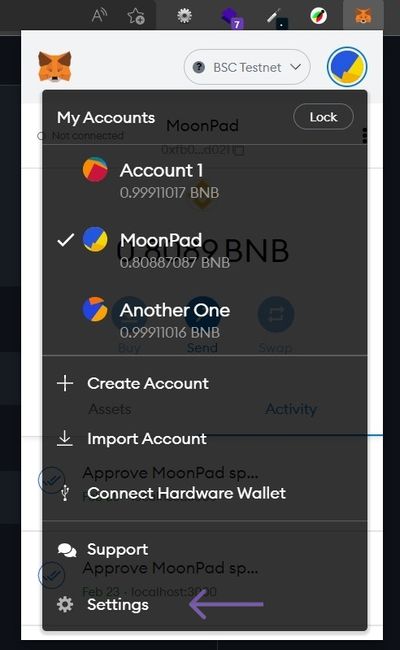
Good to know: if you get an error like "Nonce too high. Expected nonce to be 1 but got 6," Open the wallet, go to "Settings", and then "Advance", and click on the "Reset Account" button.
Trends & Conclusion
As seen on the Internet, popular Web3 YouTubers like Nader Dabit, Dapp University, and Patrick Collins are using Ethers.js in their latest crash course and recommend it. Fireship also used Ethers.js in his Web3 related videos.
From extensive documentation to support in different environments, Ethers.js is taking the lead. Web3.js can also be improved, and it is also being used by a decent number of developers. Please choose whatever makes you feel like it's easier to code, and don't run after rumors.