
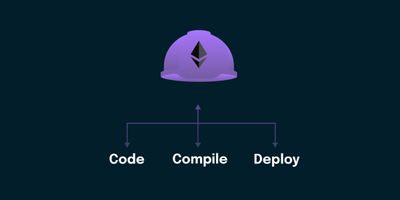
Code, Compile, and Deploy using HardHat
 By Dibas Dauliya
Share
By Dibas Dauliya
Share

In this article, we will setup the hardhat coding environment, then we’ll do solidity coding to read and write data in blockchain. After that, we will compile the solidity code and it will give us ABI, which stands for Application Binary Interface, and it is used to interact to the blockchain contract from the frontend.
Then, we will deploy our contract in the localhost, which gives contract address. Contract address is another component which is required to interact with the deployed contract from the frontend.
Hardhat is the industry standard tool for the development of smart contracts. Truffle is the popular alternative for it, but we’ll use Hardhat because of its easy setup and user friendly behavior.
If you want to learn more about pros and cons of Truffle and Hardhat then you can check our Hardhat vs Truffle article.
Setup Environment for Hardhat
Create a folder and open it in your favorite code editor.
After that, run npx hardhat init to initialize the Hardhat project. Then choose Create a JavaScript project. After that type period (.) and hit enter. Then type y or n to add or ignore .gitignore . It is required if you want to setup git flow.
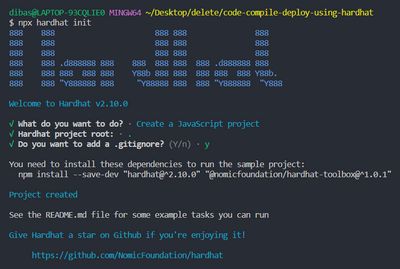
After that, as instructed in the terminal, run this command.
npm install --save-dev "hardhat@^2.10.0" "@nomicfoundation/hardhat-toolbox@^1.0.1”So lemme give the quick overview of the project structure:
- contracts - It is the folder where our business ideas in smart contract lives.
- node_modules - As you may now, it contains the files and folders of the packages that we installed using npm and listed in
package.jsonfile. - scripts - It contains JavaScript or TypeScript code to deploy our contact to the local or cloud blockchain.
- test - As the name auto-explains itself, it contains the code to test the results of our smart contract.
- hardhat.config.js - It contains the configuration settings for the Hardhat projects like the version of solidity language, network(s) to deploy our code
Soo let’s build the small project.
Small 'Show Name' Project
In this simple project, we’ll just declare the string variable, and create two functions: One to set the name in the variable and another to get the name.
Code Smart Contract
Go to the contracts folder, and create a filed named ShowName.sol. .sol is the extension for solidity files.
On the top of the file, declare the version of the solidity so compiler can easily compile the code into machine level language. The version should match the version mentioned in hardhat.config.js.
After that, create a contract with the name ShowName. Then create a string variable named MyName, and declare the set and get functions to set and get the name.
contract ShowName {
    string MyName;

    function set(string memory name) public {
        MyName = name;
    }

    function get() public view returns (string memory) {
        return MyName;
    }
}
The set and get functions accepts and returns string, and we should mention its location, which is memory, since solidity version 0.5.0.
We can remove the get function and add public after the type declaration in the MyName variable.
string public MyName;That’s it for the smart contract coding part.
Now, let’s write the script to deploy the contact.
Deploy Smart Contract
Go to the scripts folder and then open the deploy.js file.
Remove the existing codes under the main function. After that call ethers from the hardhat, and pass the name of contract in the getContractFactory of the ethers.
Store the instance of the contract in the variable named ShowName . It returns promise so await it. After that call deploy method from that instance and it also need to be awaited, and store it in variable named showName.
After that, call the deployed method from the showName , and it contains the useful information like block number, address, block hash, gas price, and many more.
After that, to set and get the name, we can call the set function from showName and pass the string value in it and await it. After that you can call the get function and console its output to get the value of name.
You can also call showName if you added public while declaring the variable in the contract.
const hre = require('hardhat')

async function main() {
  const ShowName = await hre.ethers.getContractFactory('ShowName')
  const showName = await ShowName.deploy()

  await showName.deployed()
  console.log('Contract deployed to:', showName.address)

  await showName.set('Dibass')
  // console.log('The name is:', await showName.get())
  console.log('The name is:', await showName.MyName())
}

main().catch((error) => {
  console.error(error)
  process.exitCode = 1
})
Finally, it is a moment to open the terminal and run the deploy script. BUT, before that, we need to spin up local blockchain server. It will generate the test account with test ethers which we need as a gas fee while deploying the contract.
Run npx hardhat node command to get the test account.
After that, run npx hardhat run scripts/deploy.js --network localhost to deploy the contract in local network.
Once you ran that command, hardhat will compile your code and stores ABI code and others inside artifacts folder. You’ll need while communicating the contract from frontend. Terminal will also log the contract address, and it is also required while dealing with frontend. And the most interesting part is that, It will also log the name you set in the script.js file.
If you want to set and call the name from the frontend then you can read this article. Thank you so much.